AI 그림이 심심한 이유는 딱 하나: ‘포인트 1개’로 해결하는 프롬프트 6개

AI 그림이 밋밋해 보일 때, 대부분은 디테일 문제가 아닙니다.
‘어디를 보게 할지’를 정하지 않았기 때문입니다. 이 글에서는 실제로 효과 있었던 시선 유도 연출 6가지를 Before/After 프롬프트로 바로 써먹을 수 있게 정리했습니다.
‘1포인트 집중’ + 밀도 차이
프로 일러스트레이터들이 공통으로 쓰는 방식이 있습니다. 보여주고 싶은 하나의 모티브에 집중해서 보여주고 싶은 곳만 밀도 있게 보여주고, 나머지는 의도적으로 힘을 빼는 거죠.
비교 프롬프트 실험: Before vs After
1. 시선 집중: 평면적 나열 vs 인물 강조
Before (단순 나열)
anime screencap, 1girl, standing in street, detailed background, daylight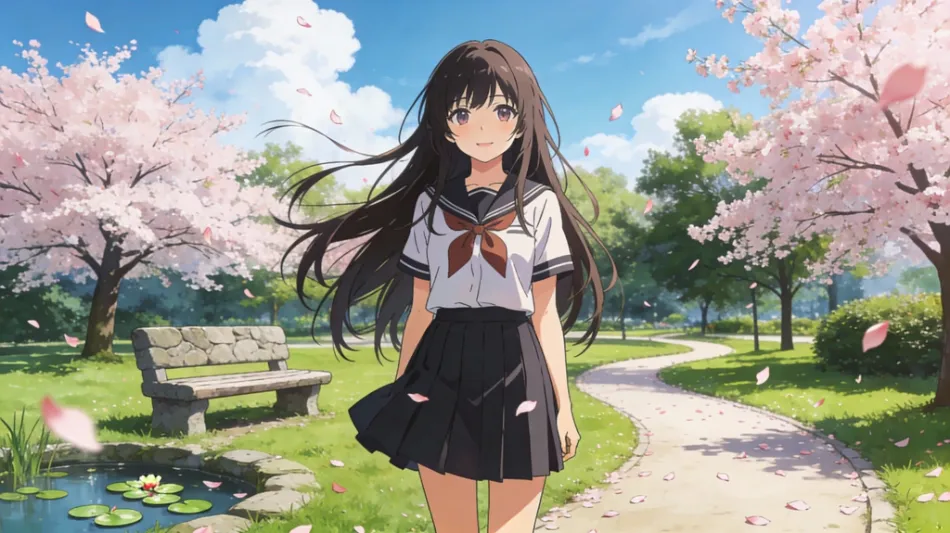
After (시선 유도 적용)
anime key vusual, 1girl, standing in street, focus on face, shallow depth of field, blurred background, bokeh, rim light, cinematic composition

Point: ‘심도(Depth of field)’와 ‘블러’를 사용해 배경 정보를 날리고 인물, 특히 얼굴로 시선을 강제 이동시켰습니다.
편집 프롬프트: 시선 집중(심도/블러)
focus on face
shallow depth of field
blurred background
bokeh
rim light
cinematic composition
2. 조명 연출: 밋밋한 빛 vs 드라마틱한 명암
Before
anime key visual, fantasy warrior, holding sword, forest, lighting
After
anime key visual, fantasy warrior, holding sword, dramatic lighting, chiaroscuro, volumetric lighting, dark background, strong contrast, glowing sword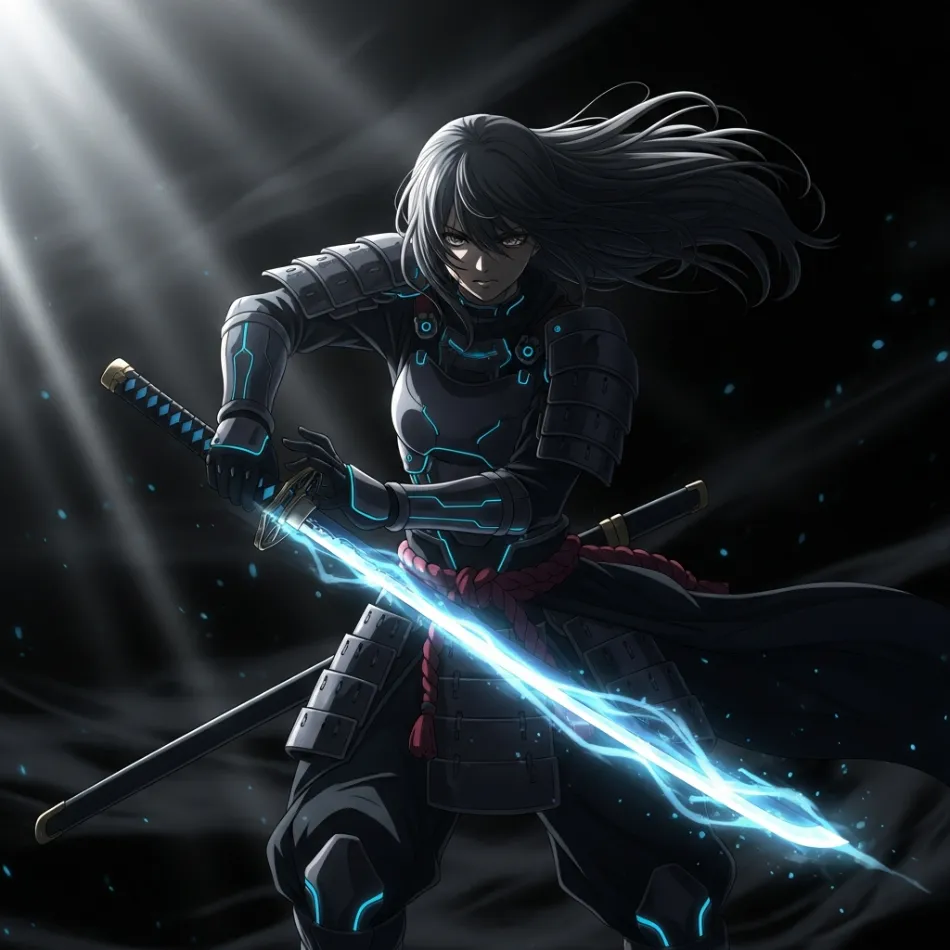
Point: ‘명암비(Contrast)’를 키우면, 시선은 자동으로 밝은 주제부에 고정됩니다.
편집 프롬프트: 조명/명암(드라마틱 라이트)
dramatic lighting
chiaroscuro
volumetric lighting
dark background
strong contrast
3. 정보량 조절: 투머치 배경 vs 여백의 미
Before
cyberpunk girl, detailed neon city, shops, cars, crowds, complex detailsAfter
cyberpunk girl, neon city, negative space, simple background, minimal composition, rule of thirds, atmospheric
Point: 배경을 단순화하면, 캐릭터 실루엣이 살아납니다. 이게 바로 여백의 힘입니다.
편집 프롬프트: 정보량 조절(여백/미니멀)
negative space
simple background
minimal composition
rule of thirds
atmospheric
4. 색채 대비: 채도(Saturation)의 뺄셈
Before (색상 난립)
colorful anime girl, colorful flowers, rainbow background, vibrant colorsAfter (채도 대비 적용)
anime girl, red eyes, vivid red dress, monochrome background, greyscale world, color splash, selective color, muted tones
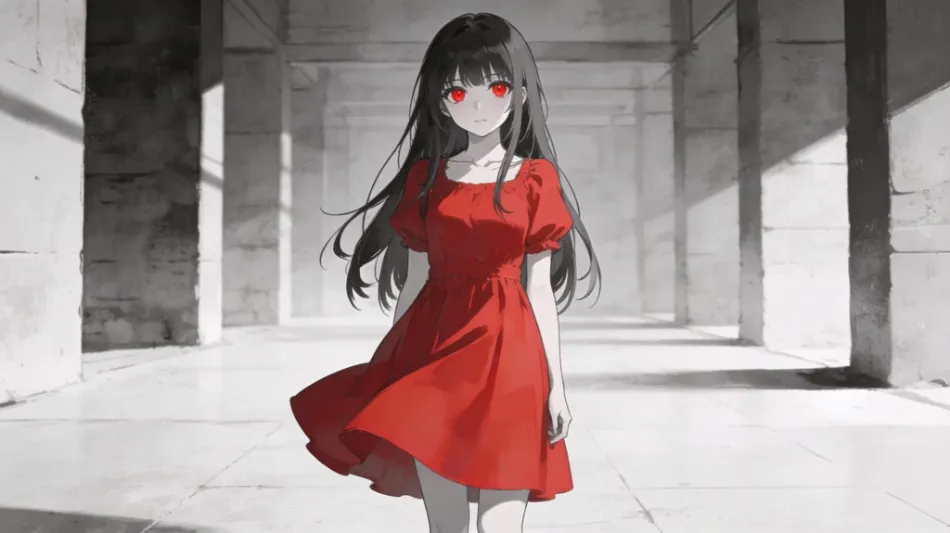
Point: 배경 채도를 쫙 빼고, 제부에만 고채도(Vivid)를 남겨 시선을 강제로 고정시키는 기법입니다.
편집 프롬프트: 색채 대비(채도 빼기/선택색)
monochrome background
greyscale world
color splash
selective color
muted tones
5. 상호작용: 단순 관찰 vs 1인칭 시점(POV)
Before
girl standing, hand upAfter
anime key visual, girl, reaching towards camera, touching viewer, point of view, pov, hand reaching, blur foreground, looking at viewer
Point: 단순히 서 있는 게 아니라, 화면 밖의 독자에게 손을 뻗거나 말을 거는 듯한 POV(1인칭 시점) 연출로 몰입감을 높입니다.
편집 프롬프트: 상호작용(POV/카메라 접근)
reaching towards camera
touching viewer
point of view
pov
blur foreground
looking at viewer
6. 원근법: 정직한 비율 vs 박력있는 왜곡
Before
warrior holding giant hammer, full bodyAfter
anime key visual, warrior holding giant hammer, fisheye lens, exaggerated perspective, huge weapon in foreground, dynamic angle, foreshortening
Point: 어안 렌즈(Fisheye)나 원근 과장을 사용해, 무기나 손을 얼굴보다 크게 그려 박력을 더하는 방식입니다. 무기나 손을 얼굴보다 크게. 원근을 과장하면, 화면에 힘이 생깁니다.
편집 프롬프트: 원근 과장(렌즈/왜곡/박력)
fisheye lens
exaggerated perspective
huge weapon in foreground
dynamic angle
foreshortening